Setting up Edison/Explorer Board on Windows/PC
(This is testing a separate workflow for Windows only. Please refer to the main Edison setup guide as well for troubleshooting & full instructions for other computer setup processes.)
Hardware Assumptions for this page
- Using an Explorer Board and Edison
- Using an Windows computer
Preparing/flashing the Edison
We recommend buying an Edison that is preinstalled with jubilinux. If you did that, head back to the main install instructions to begin installing Wifi and Dependencies.
If you didn’t buy your Edison with jubilinux preinstalled, it comes with an operating system, called Yocto, that doesn’t work easily with OpenAPS. The first step is to replace the operating system with a new one. This is called “flashing” the Edison. Both your Windows computer and the Edison board will need some work.
1-1 Prepare Windows Computer
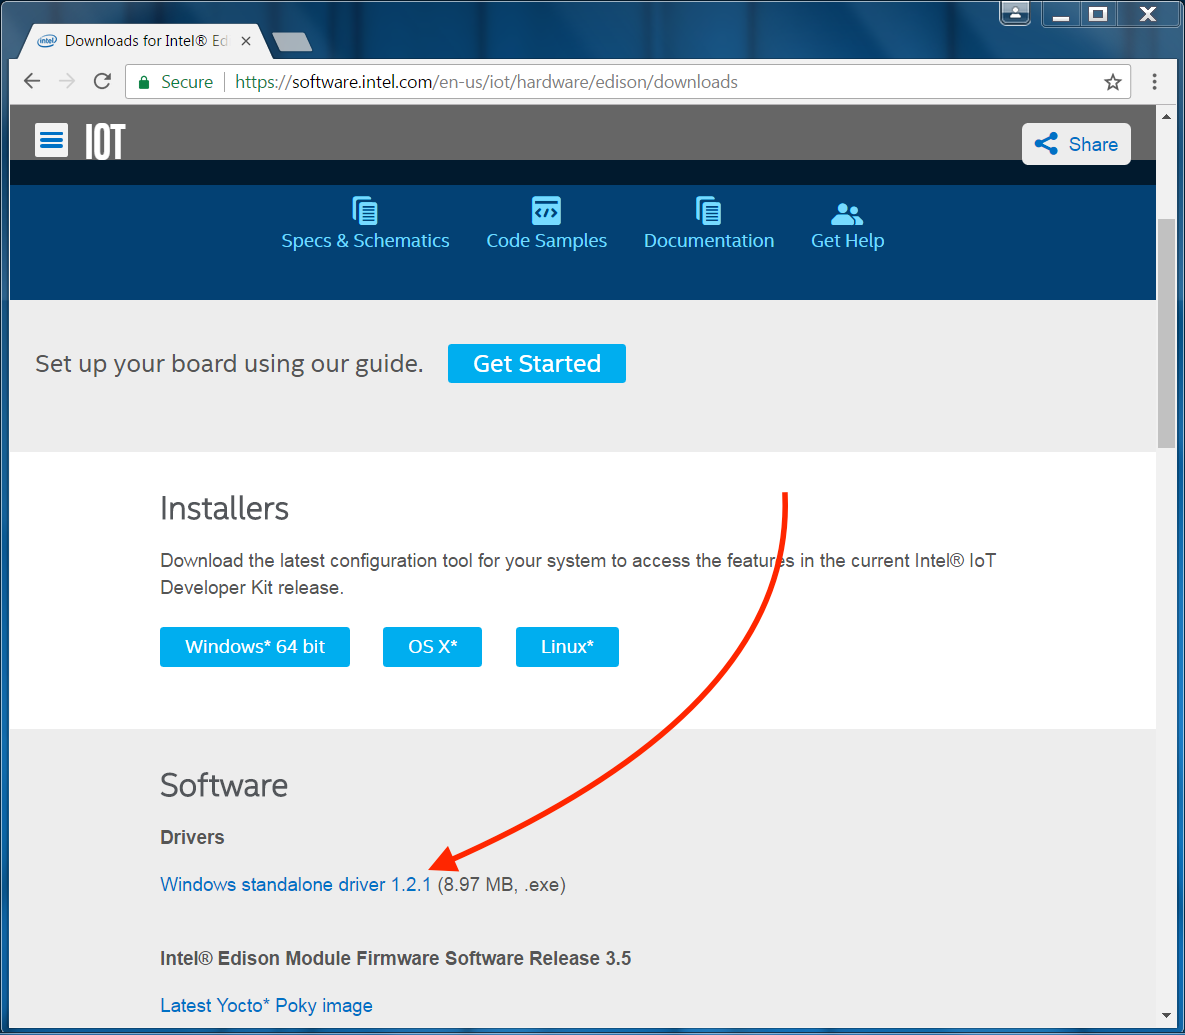
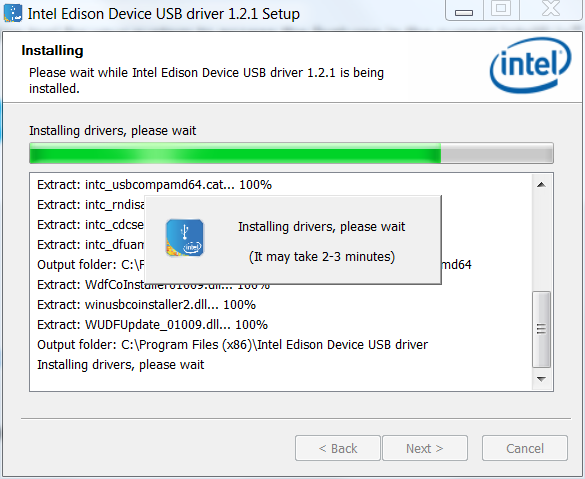
- Install the Intel Edison drivers for Windows. Select the top box “Download inteledisondriversetup1.2.1.exe”. After it is done downloading, click on the downloaded file and it will execute installation.
- (Old method) Install the Intel Edison drivers for Windows. Select the “Windows standalone driver” download. After it is done downloading, click on the downloaded file and it will execute installation. (this link no longer contains the ‘Windows standalone driver’, see the note below)
Note: Intel has announced the Edison will be discontinued at the end of 2017. As part of this, apparently, the old link to Edison drivers has been removed. We are unsure if this is a temporary issue or long term. Therefore, if the links above for Intel Edison Drivers are not working, you can use this link to download them directly from an OpenAPS user’s dropbox. Obviously screenshots below will be different if Intel has not fixed or repaired their driver downloads page for Edisons.
If none of these are working ask on the https://gitter.im/nightscout/intend-to-bolus chat.
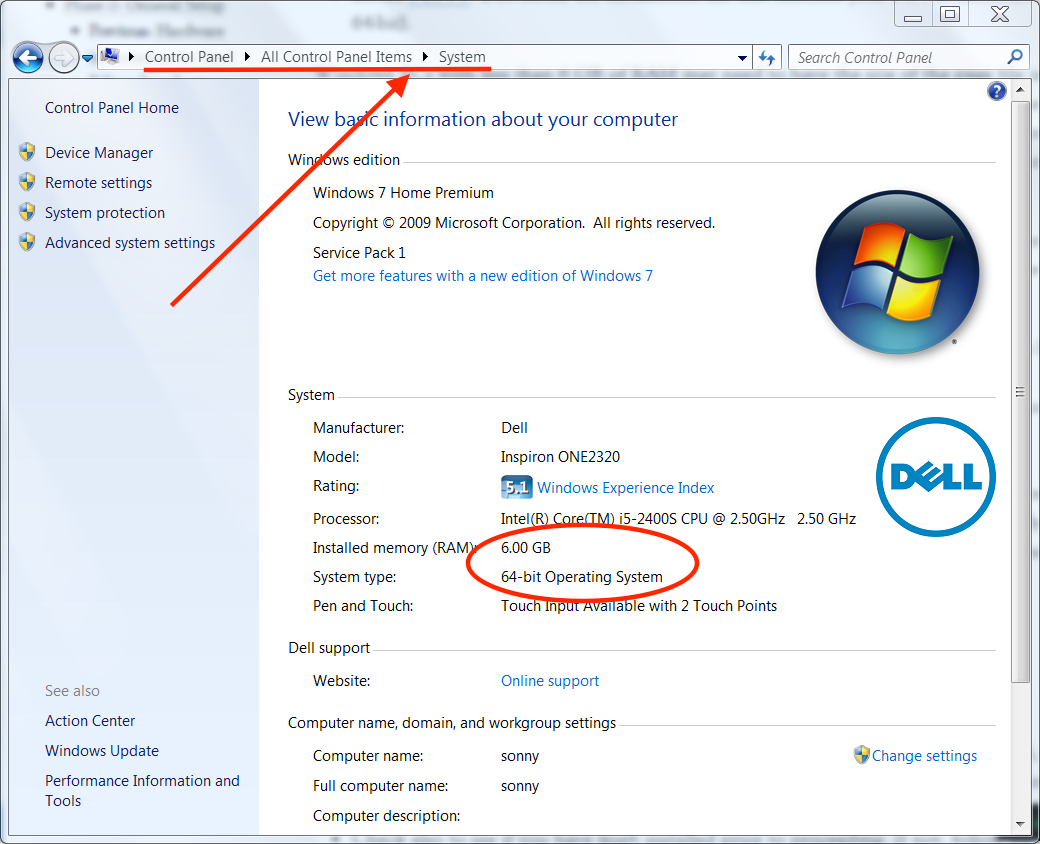
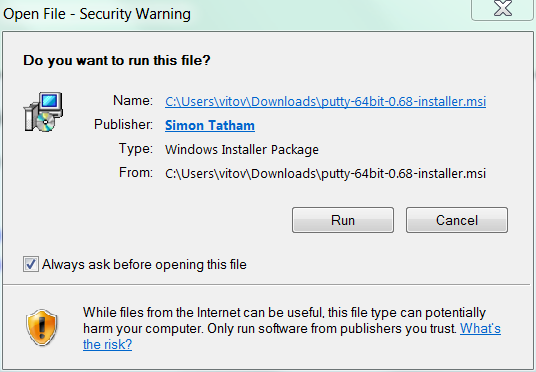
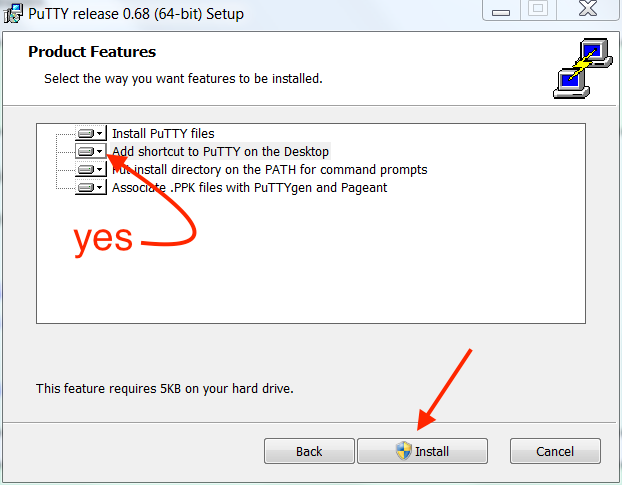
- Install PuTTY. PuTTY is the program you will normally use to login to your rig in the future from the computer. Creating a desktop shortcut for it is a good idea, since you will likely use it often. Download the installation file that matches your PC’s architecture (32-bit or 64-bit). If you are unsure, you can check your computer’s build and memory in the Control Panel. Example shown is for a 64-bit computer. If unsure, installing the 32-bit version won’t harm anything...it just might be a little slower to use PuTTY.

Side Note regarding computers with less than 6 GB RAM
Windows PCs with less than 6 GB of RAM may need to have the size of the page file increased to flash the Edison. You can check your RAM as shown in the Control Panel picture above. If less than 6 GB is showing, then close all unnecessary programs and attempt to flash the device. If the flash operation fails follow these steps to ensure enough swap space is allocated when the computer boots, then restart and try again. Only do this if flashing the device doesn’t work without changing these settings.
Important: Write down the settings in the Virtual Memory window before you make any changes to your system. When you finish the flash process you must return these settings to their original values or Windows may become unstable.
- Go to the Control Panel, click All Control Panel Items, then click System. At top left click the Remote Settings link.
- Select the Advanced tab in the System Properties window, then under Performance click Settings.
- On the Advanced tab click the Change... button to change the page size.
- In the Virtual Memory window uncheck “Automatically manage paging file size for all drives,”
- Click “Custom size,” below
- Set the initial size to 4096 MB
- Set maximum size to 6144 MB (2048 MB larger thand the initial size) (If you have already attempted this process at least once and the flashing still hasn’t worked, increase both size settings by 1024 MB and try again.)
- Click the Set button, then click OK until all windows are closed.
- Reboot and attempt the flash process.
Download jubilinux and dfu-util
- Download Jubilinux (jubilinux version 0.3.0 is the current version known to work; jubilinux 0.2.0 runs Debian jessie, which is NOT supported by Debian any longer). Jubilinux will download in a zipped format to your Downloads folder. Locate the folder in your Downloads and right-click the
jubilinux.zipfolder. Selectextract allfrom the menu. Saving it to your root user directory is a good idea. Your root directory is the set of folders that exist under your User name in Windows. For example, the destination for saving jubilinux to your root directory would beC:\Users\yourusername\jubilinux
Note The extract all command comes standard for all Windows machines. However, in some instances, it may not be active for zipped files. If you do not see the extract all option in the right-click menu, right-click the zipped file, choose Properties at the bottom of the context menu. On the General tab, click on the button next to the “opens with” and change it to use Windows Explorer. Apply the change and select OK to save the change. You should now be able to right-click the jubilinux.zip file to extract all.
- Now we are going to download two files from DFU-UTIL: libusb-1.0.dll and dfu-util.exe. Click on those two links to download the files to your Downloads folder. Navigate to your Downloads folder and choose to “move” those folders to the jubilinux folder that you unzipped earlier. When you successfully move those two folders into the jubilinux folder, you should see files/folders inside the jubilinux folder like so:

1-2 Prepare Edison
Now we move to the Edison. You’ll see two microB USB ports on your explorer board. One is labeled OTG (that’s for flashing) and one is labeled UART (that’s for logging into the Edison from a computer). We will need to use both to flash. We’re going to plug both of those into our computer’s USB ports using the cables listed in the parts list (Dexcom’s charging cable will work too).
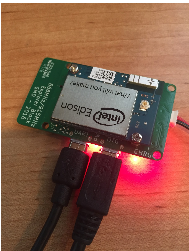
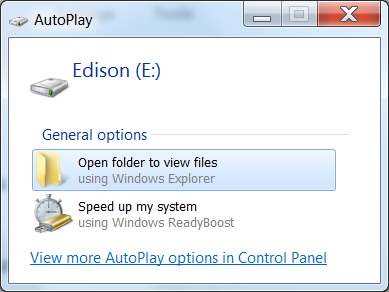
Once you plug in the cables, you should see your Edison board pop-up as a connected “device”. If you don’t…try different cables.
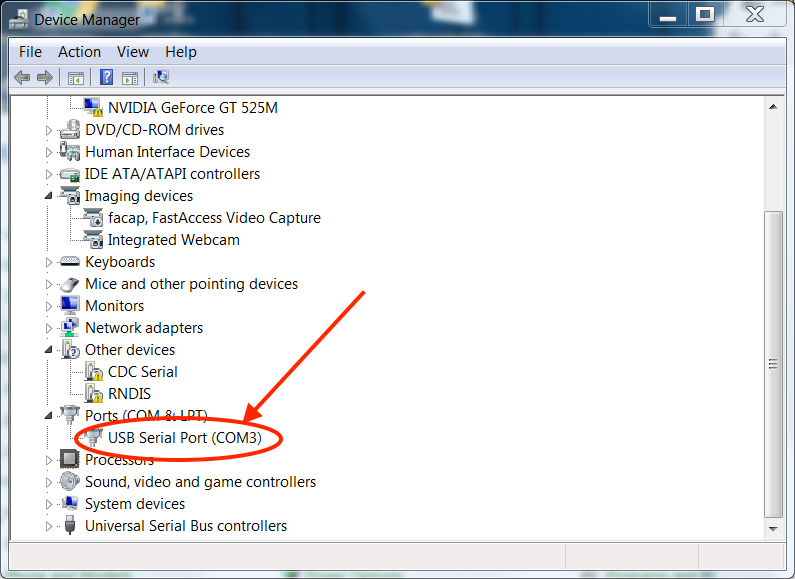
- Go to Control Panel\All Control Panel Items\Device Manager\Ports\ and look for USB Serial Port COMXX. If you have multiple and unsure of which is the port you need: Make note of existing ports. Unplug the cable from the Explorer Board. Notice which port disappears. this is the port you are looking for. If only one shows up, that is your Edison’s port.
- Open PuTTY, change from SSH to Serial. It normally defaults to COM1 and speed of 9600. Change the COM number to the number you found when you plugged into the Explorer Board. Change the speed (baud rate) to 115200.
- Once you’ve made those changes, Click on OPEN at the bottom of your Putty configuration window.
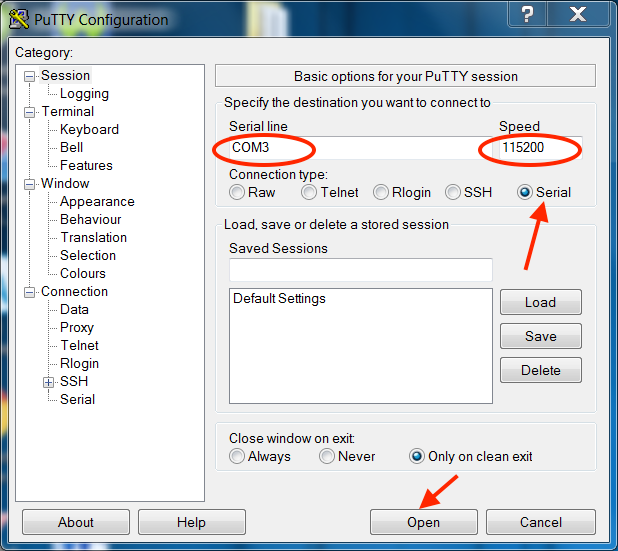
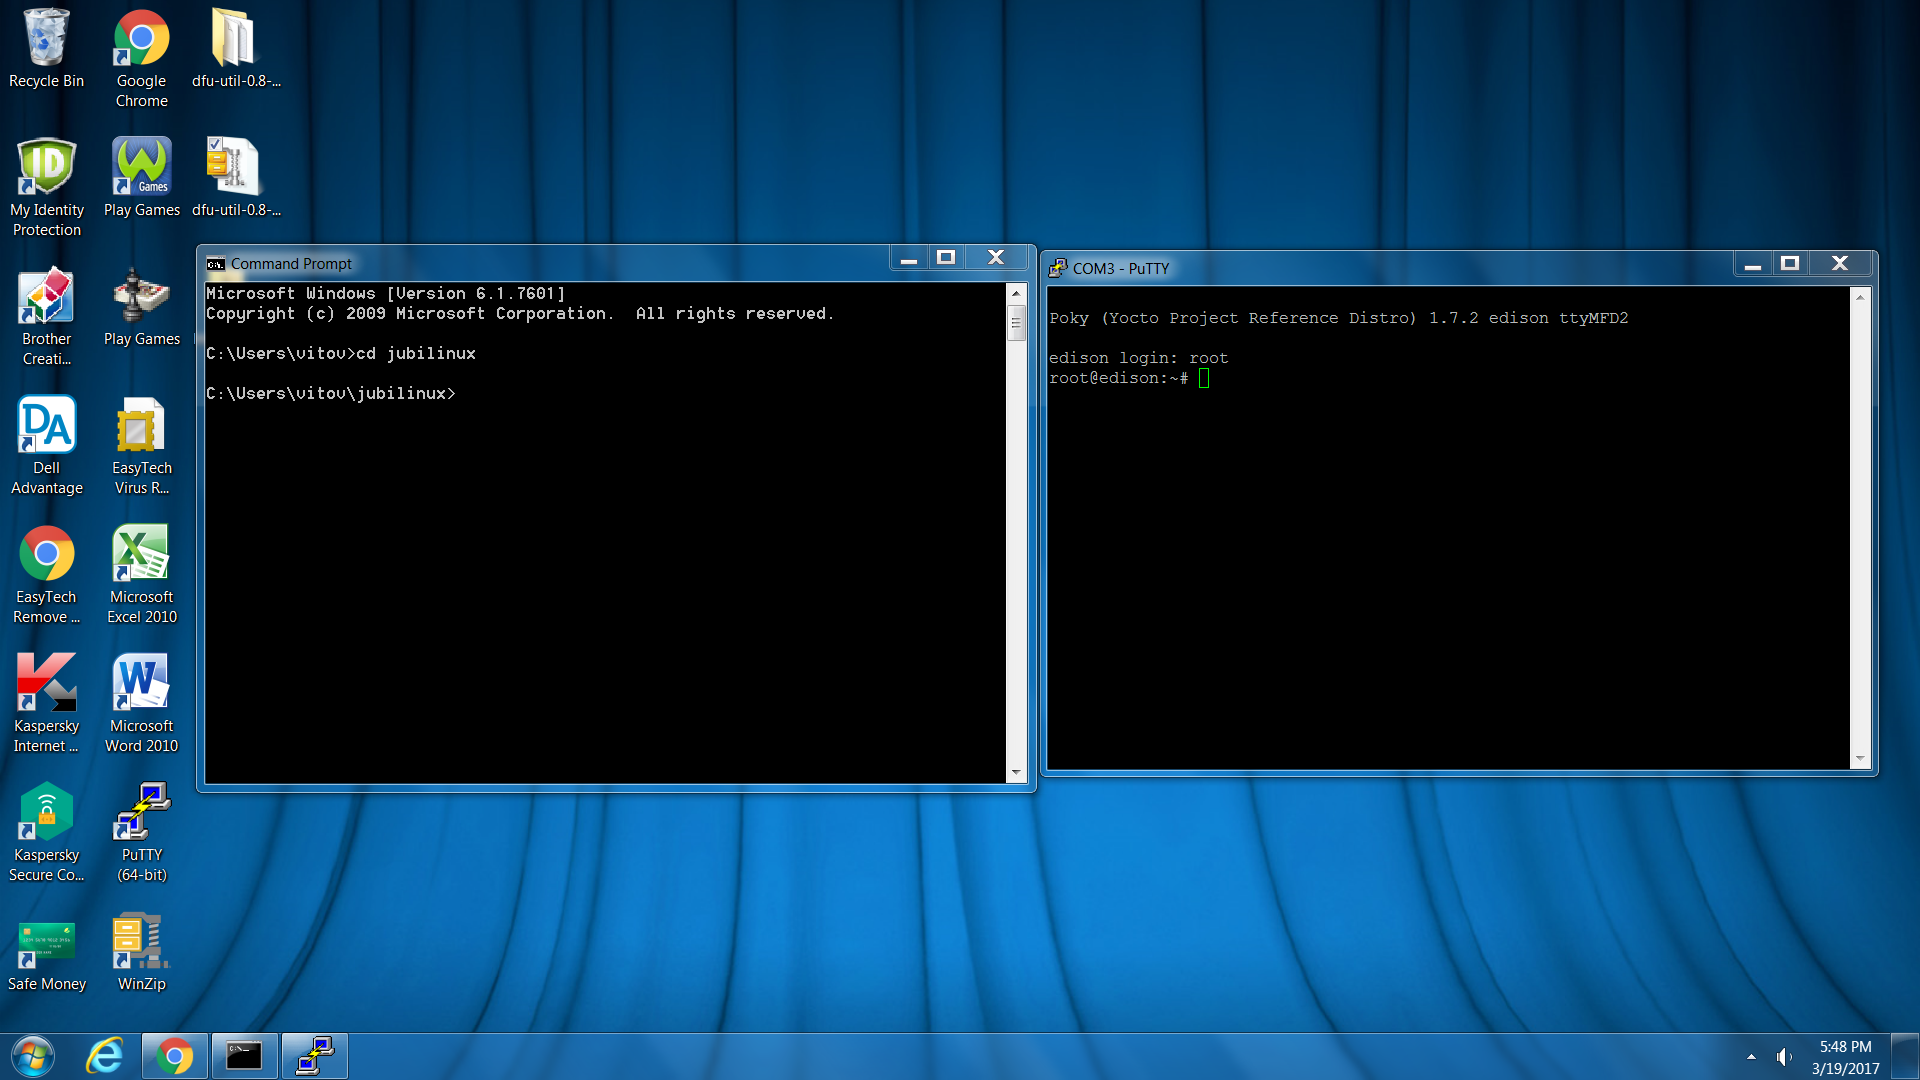
- Once the screen comes up, press enter a few times to wake things up. This will give you a “console” window of what is happening on your Edison. Move that window over to the right side of your screen without resizing it, if you can. (We are going to open another window later on the left side.)
- Now you will see a login prompt for the Edison on the console screen. Login using the username “root” (all lowercase) and no password. This will have us ready to enter the commands coming up in the next steps later.
- Now we are going to open a second window...a “flash” window...using a different program than PuTTY. Go to your Windows Start menu and search for a program called Command Prompt. Open Command Prompt and you should be given at a prompt for your User Root directory. Assuming you saved your jubilinux folder to your user root directory (as described above), enter
cd jubilinuxin the prompt and press return. If you saved it somewhere else, you will need to navigate to that location. Move that flash window to the left side of the screen.
Your screens should look like this:
1-3 Flash the Edison
In your flash window on the left (command prompt window), enter
flashall.batYou’ll get a prompt that asks you to “plug and reboot” the Edison board. You’re done with this screen for now. Just leave it alone (don’t close window) and go to next step.

Return to the screen on the right (the PuTTY window) and enter
reboot
You will see many, many messages go by on the screens (mostly on the right-side screen). If this fails see below for two workaround options.
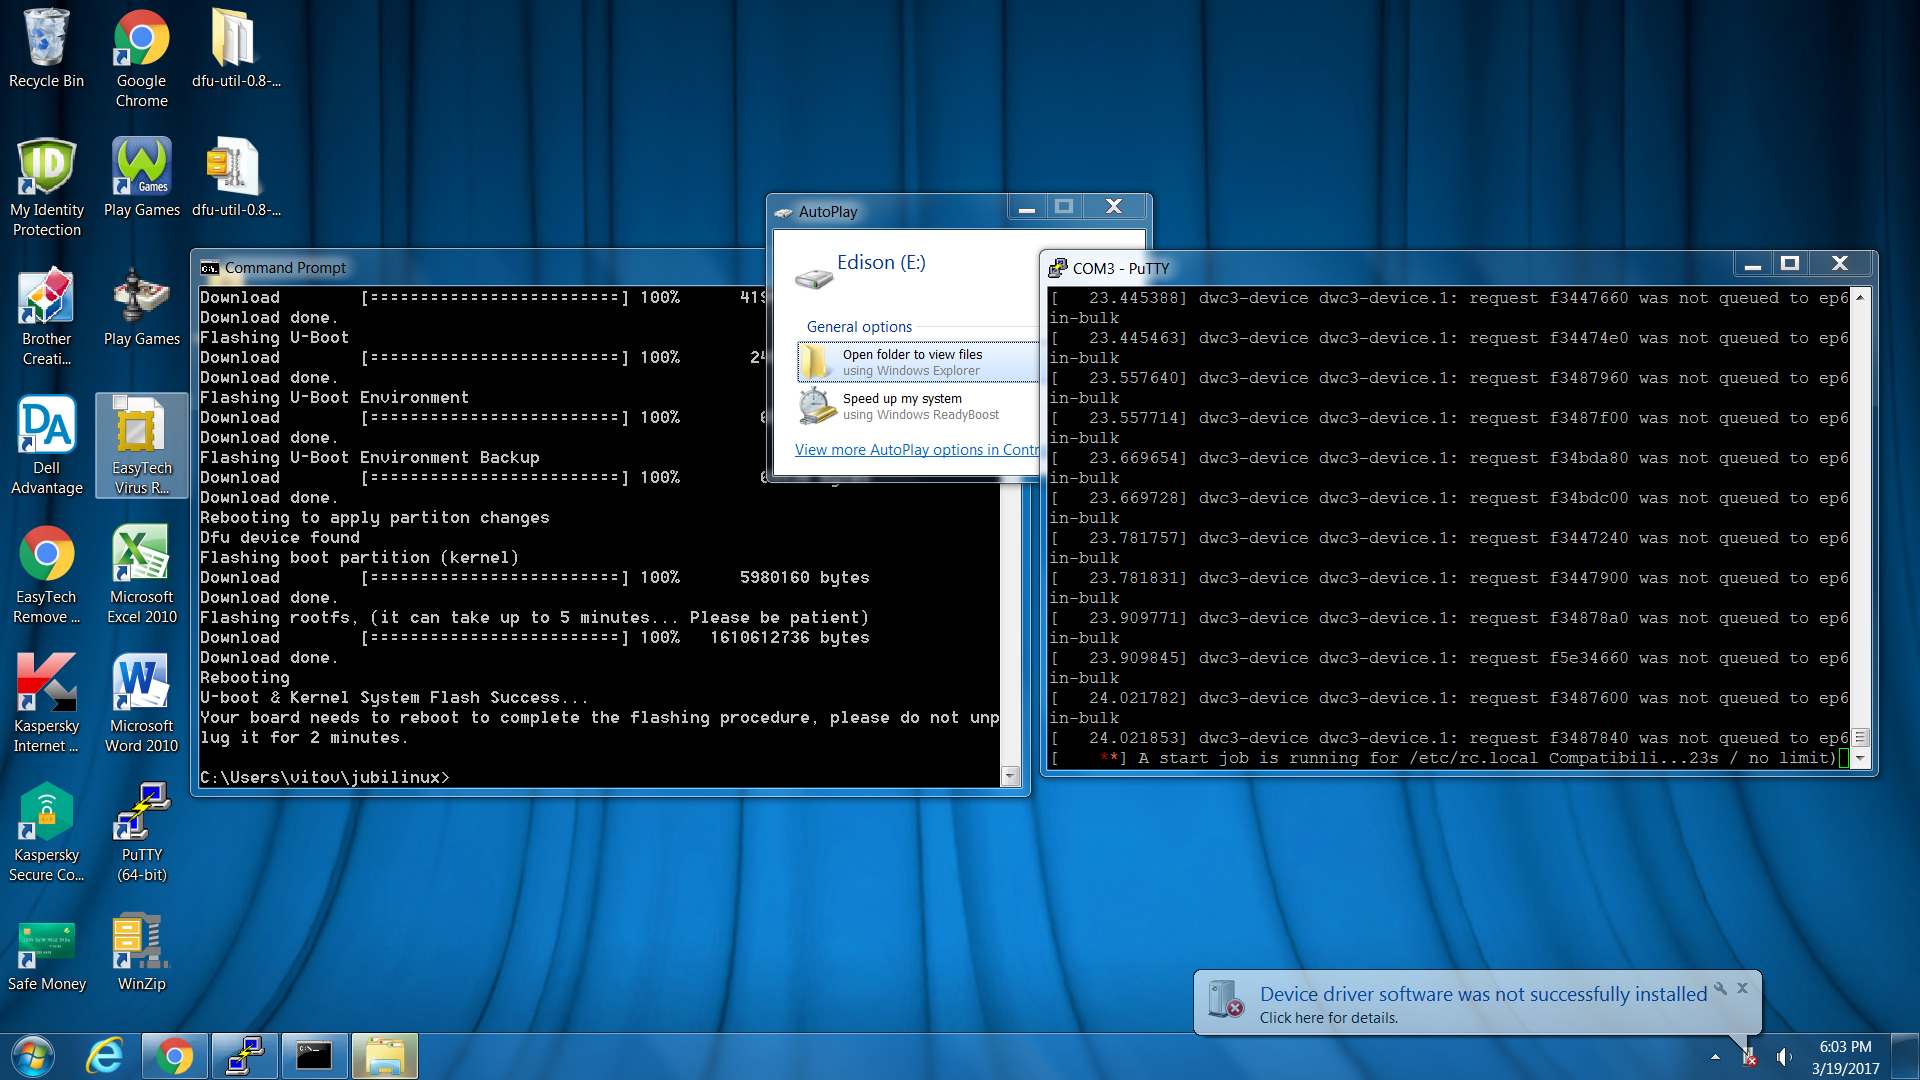
After several reboots (don’t panic), you should get a ubilinux login prompt (If you see Yocto instead of ubilinux, then you need to go back to Step 1-2 and start the flash process over again). Use login root and password edison.
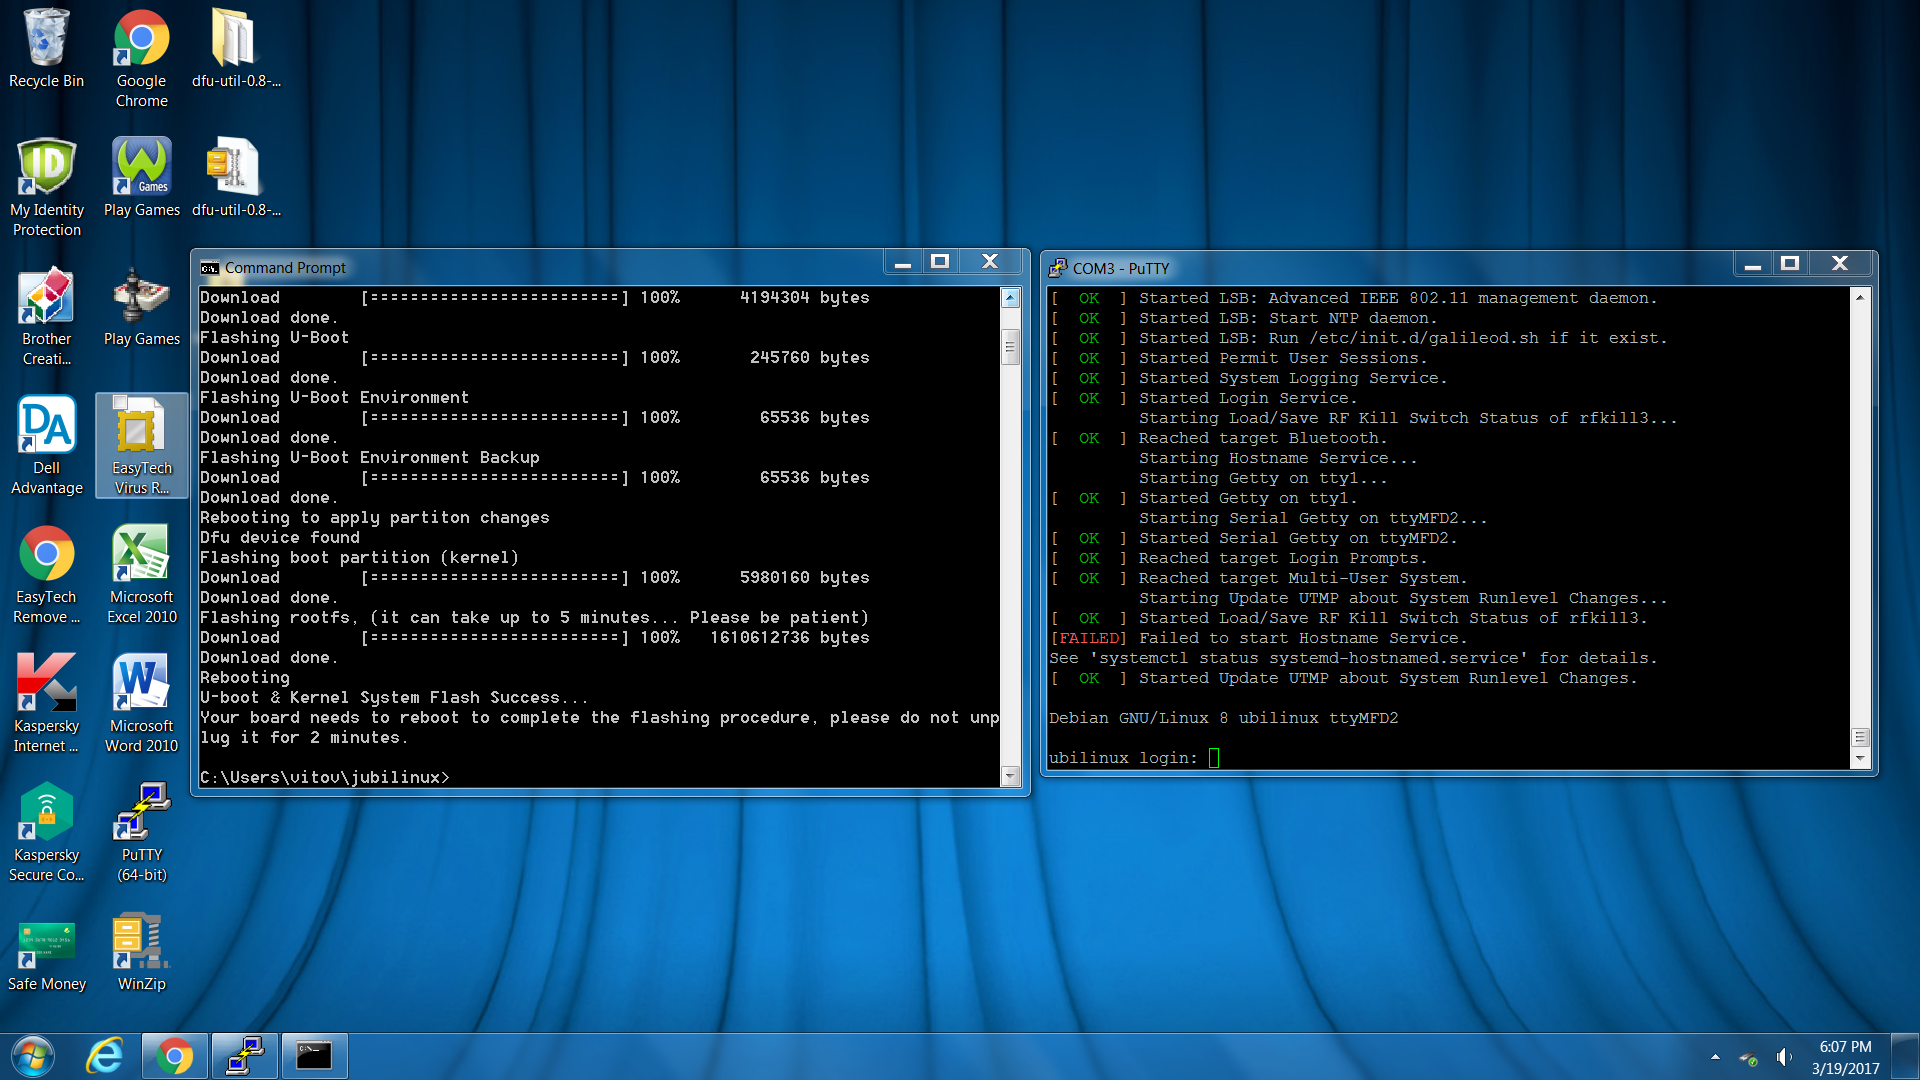
CONGRATULATIONS! You just flashed the Edison! Wahoo! Now, let’s keep going. Head back to the main install instructions for the easiest route of installing wifi, dependencies, and installing OpenAPS. (Below is manual instructions, but the main install instructions have an easier path to automate the below.)
Errors when flashing the rig
If the rig fails to flash correctly or you don’t have access to root to type the reboot command you have a couple of options providing you can connect to the rig via PuTTY:
Either:
- After running the
flashall.batcommand in the Windows command prompt window, you can hold down the little black power button on the underside of the rig next to the battery connector for 10 seconds, which will turn the rig off, and the centre light will go out. Pressing little black power button again for 10 seconds will restart the rig and the flash process will continue (the same as rebooting the rig via PuTTY).
Or: (this one is eaiser to do)
- Make sure you can talk to the rig via Putty via the USB cables via the UART port
- Unplug both USB cables from the rig (the Edison is unpowered), it might be eaiser to do this from your PC end of the USB cable
- Enter the
flashall.batcommand from the Windows command prompt window - Immediately plug in the two USB cables to connect the rig to the PC
The Edison begins to boot and the PC recognizes the Edison board via the drivers that were loaded onto the PC. The Windows command window will show the progress of the flashall command. If this doesn’t work the first time, repeat. The flashall command seems to be able to incrementally correct loading issues if it is done over and over again. The Edison is loaded through the OTG port.
It’s really not necessary to have Putty up and running to reflash the Edison. However it is nice to see what is going on. The important part is to get the Edison connected quickly after the flashall command is entered. Once that is done you can restart Putty and see the flash process happening from both the Windows Command window and the Putty Terminal screen.
1-4 Hostname for Edison
Now that you’ve finished flashing, the Edison is going to need a couple things to finish setting it up; Hostname/passwords and Multiple WiFi networks
Hostname and password
- From that same screen we just left off , enter these three commands in succession
myedisonhostname=<thehostname-you-want><—But replace the <> section with your chosen hostname.Then run the next two lines, one at a time, without modification.
echo $myedisonhostname > /etc/hostname
sed -r -i"" "s/localhost( jubilinux)?$/localhost $myedisonhostname/" /etc/hosts
IMPORTANT
- To change the password for your Edison to a more secure password than “edison”, enter
passwd root - Follow the commands to reset the password. Repeat for
passwd edison - SAVE PASSWORDS somewhere, you’ll want them.
1.5 Set up Wifi
Enter vi /etc/network/interfaces
Type “i” to enter INSERT mode for editing on the file.
HELPFUL TIP: If you are new to insert mode, realize that it inserts characters at the highlighted cursor (it does not overwrite the character showing beneath the cursor). And, the default is that the cursor will be at the top left of the screen to start, so you will need to use the arrow keys to move the cursor to the area where you want to start typing. If you freak out that you’ve made a change that you don’t want to commit...you can simply press the ESC key and then type (no quotes) “:q!” to quit without saving any of your typing/changes.
- Uncomment ‘auto wlan0’ (remove the
#at the beginning of the line) - Edit the next two lines to read:
auto wlan0
iface wlan0 inet dhcp
    wpa-conf /etc/wpa_supplicant/wpa_supplicant.conf
Comment out or delete the wpa-ssid and wpa-psk lines.
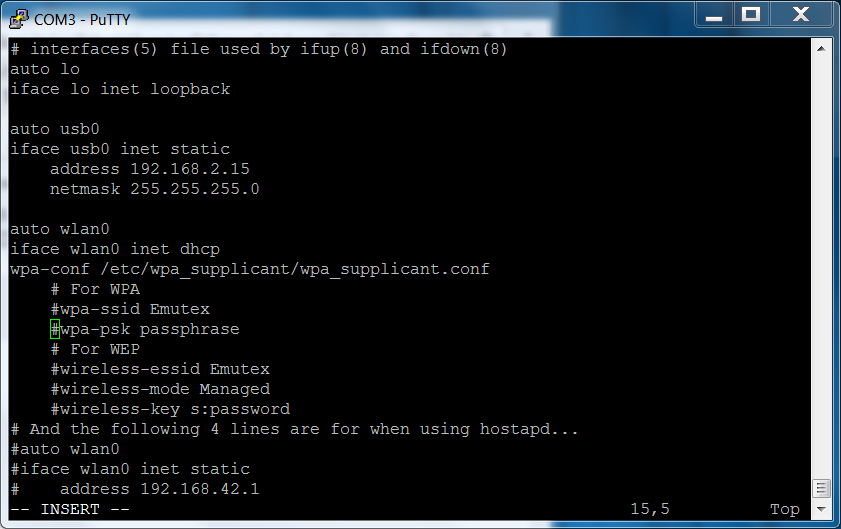
After editing, your file should look like:
# interfaces(5) file used by ifup(8) and ifdown(8)
auto lo
iface lo inet loopback

auto usb0
iface usb0 inet static
    address 192.168.2.15
    netmask 255.255.255.0

auto wlan0
iface wlan0 inet dhcp
    wpa-conf /etc/wpa_supplicant/wpa_supplicant.conf
Press Esc and then type ‘:wq’ and press Enter to write the file and quit
Enter vi /etc/wpa_supplicant/wpa_supplicant.conf
Type ‘i’ to get into INSERT mode and add the following to the end, once for each network you want to add. Be sure to include the quotes around the network name and password.
network={
    ssid="my network"
    psk="my wifi password"
}
If you want to add open networks to your list, then add:
network={
        key_mgmt=NONE
        priority=-999
}
If you have a hidden wifi network add the line scan_ssid=1.
Some wifi networks require you to accept a terms and conditions prior to allowing access. For example, Starbucks coffee shops and many hotels. These networks are termed “captive” networks and connecting your rig to them is currently not an option.
Other wifi networks may require you to enter a login name and password at an initial screen before allowing access (such as many school district wifi networks). Some users have success in using the following wpa network settings for those types of networks:
network={
   scan_ssid=1
   ssid="network name"
   password="wifi password"
   identity="wifi username"
   key_mgmt=WPA-EAP
   pairwise=CCMP TKIP
   group=CCMP TKIP WEP104 WEP40
   eap=TTLS PEAP TLS
   priority=1
}
Press Esc and then type ‘:wq’ and press Enter to write the file and quit.
1.6 Test internet connection
reboot to apply the wifi changes and (hopefully) get online
After rebooting, log back in and type iwgetid -r to make sure you successfully connected to wifi.
Run ifconfig wlan0 to determine the IP address of the wireless interface, in case you need it to SSH below. Alternatively, if you know how to login to your router, you can also see the Edison’s IP address there.
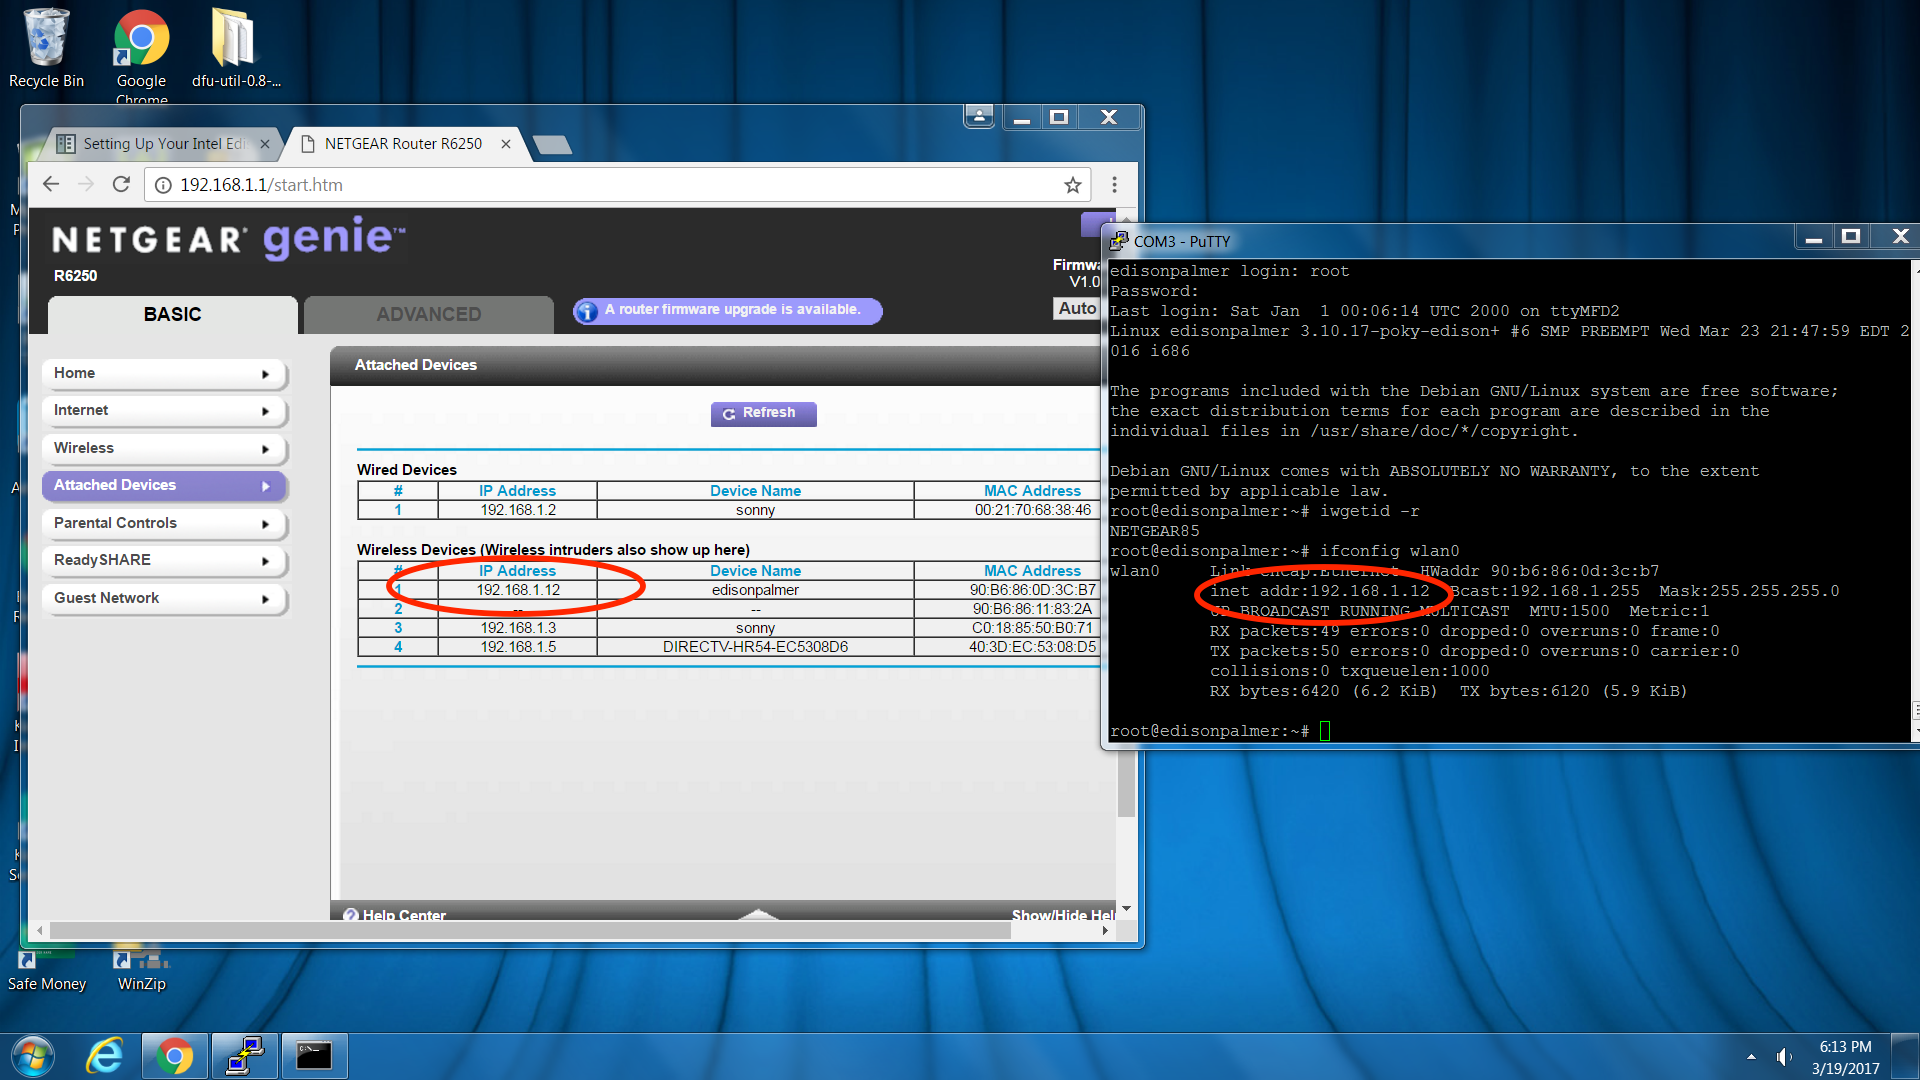
Leave the serial window open in case you can’t get in via SSH and need to fix your wifi config.
If you need more details on setting up wpa_supplicant.conf, see one of these guides:
- http://weworkweplay.com/play/automatically-connect-a-raspberry-pi-to-a-wifi-network/
- http://www.geeked.info/raspberry-pi-add-multiple-wifi-access-points/
- http://raspberrypi.stackexchange.com/questions/11631/how-to-setup-multiple-wifi-networks
- http://www.cs.upc.edu/lclsi/Manuales/wireless/files/wpa_supplicant.conf
1.7 Install packages, ssh keys, and other settings
From a new terminal or PuTTY window, ssh myedisonhostname.local. If you can’t connect via myedisonhostname.local (for example, on a Windows PC without iTunes), you can instead connect directly to the IP address you found with ifconfig above.
Login as root (with the password you just set above), and run the following lines one by one. The first line “dpkg -P ... ” will be quick. Check the printout to see that it ran without error. Then run the apt-get lines one at a time. They will take a long while.
dpkg -P nodejs nodejs-dev

apt-get update && apt-get -y dist-upgrade && apt-get -y autoremove

apt-get install -y sudo strace tcpdump screen acpid vim python-pip locate
And then run the next lines (first two will be quick, the last one will take you into a timezone selection menu. Run each line separately until finished)
adduser edison sudo

adduser edison dialout

dpkg-reconfigure tzdata
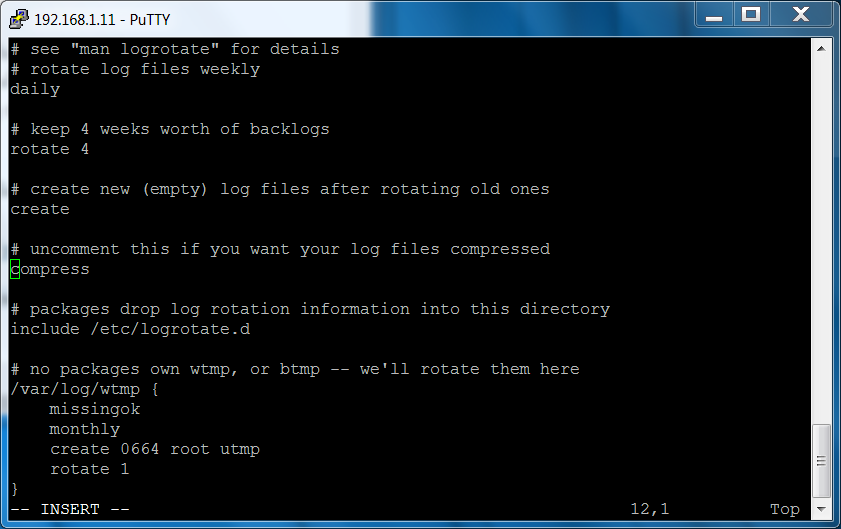
vi /etc/logrotate.conf and change the log rotation to daily from weekly and enable log compression by removing the hash on the #compress line, to reduce the probability of running out of disk space.
You have now installed the operating system and wifi networks on your Edison! You can move onto the next steps in building your OpenAPS rig.